Showing posts with label kid sewing. Show all posts

Friday, May 13, 2016

A Tale of Two Dresses

As I was going about doing some sewing for Mini, I had pulled out a really pretty stripe - the bottom of the below dress:
When I laid out the pattern  pieces, I discovered there was only enough for the skirt, and I was going to have to make a contrasting top.  No big deal.  Picked out a pink fabric, washed it, and made the bodice.
Everything was fine until I was ready to attach them, and then decided they really didn't match, after all.  So then I had a finished bodice and a finished skirt, that didn't go together.  So, I went back to the fabric stash, picked out a new skirt fabric for the finished bodice and a new bodice for the finished skirt.

Thus, two dresses.
My little model after wearing one to church last week.
 She really likes to pick up ants.  There is probably one in her hand.

 The pattern: Simplicity 1710


Friday, September 28, 2012

The Girl Sews Again

 On Saturday she declared that she wanted to do more sewing.  I pulled out some old blocks from a project I did with my niece many years ago.  E pieced the butterfly blocks together.  She chose a backing.  I did the pinning, and she started going to town with the decorative embroidery stitches on my sewing machine.  After changing thread colors 5 times, she was even figuring out how to thread the machine.
 The back.  We machined sewed the binding.  I think next time I'll cut a wider binding, so it will be easier to turn.   She's pretty happy with it.  I am even learning to not stress over the mistakes.  She's happy and I don't want to scare her away from sewing.  She even told me she wants to grow up and be an 'expert sew-er' just like me :). I also have to say that at age 9, she has much better control over the fabric and how to do things.  We may have to consider her own machine for Christmas...
She also whipped out this pillow earlier in the week.  One more kitty fabric used.  Merkitties.  How funny.


Tuesday, September 18, 2012

My Daughter Sewing

Today I have to brag on my daughter a bit.  Today she turns 9!  That means its been almost 10 years since we started the pregnant, baby, children adventure.  Unbelievable.  She's been mentioning lately that she'd like to make another quilt, or sew something.  So the other day, as I was looking at her small square blue pillow (Oma got for her years ago), I realized it could use a pillow case to make it look a bit nicer after all the years of use its gotten.

 The pillow in place with a new birthday present.
 Ellie sewing last night.  (I think I need to clean my camera lens!)
 After it was all done.
 I told her to go pick out a piece of cat fabric from the 48! yards I had still in the box.  I did the figuring and measuring, while showing her how.  She did the ironing and sewing.  Pretty snazzy!


Thursday, February 2, 2012

Star Sheet

This was one of those projects I've wanted to do since the boys got their bunkbed last year, and kept finding other things to do instead.  WD got some of those glow in the dark stars for Christmas and we've been hanging them up and making constellations, so that gave me the initiative to get this project done as well.
 A new night sky for WP.  (bonus points if you can identify the constellation).  It is made from an unhemmed piece of polyester fleece-type material.  The stars are cut from white polar fleece and sewn on with glow in the dark thread.  It looks pretty cool at night!
 This is what WP's view is since he has the bottom bunk.  Not too pretty, and I don't want the kids messing with the mattress and sheets.
 All hung up and cozy!


Friday, January 20, 2012

Jeans Recycle

 I bought some jeans for Mr Riley from the thrift store a while back.  They turned out to be too small, and a broken zipper - so after moving them around for a while, and desiring a quick & easy project, I whipped out some pants for WP.

 I used Simplicity 4833.  Out of publication now.  Why this one?  I used the same pattern for the flannel PJs.  It was already cut - and its the kind of pants pattern that only has one piece.  No side seams!
 I took off the original back pockets and moved them to the side.
 And sure, they're a little long.  But what's the point of making something if they can only wear it for 2 weeks before they grow out of it.

The Southern Institute

Tuesday, March 22, 2011

Toddler Dress - Butterick B4718

This was a gift for my two year old niece.  Butterick B4718, view A.


It was quite easy to put together.  I even did a fairly good job with the zipper!  I did two rows of the daisies, since they weren't very wide.  I think it makes a better impact this way.
(This model was not the recipient.  Good thing he doesn't realize its girls clothing!)

The fabric came from the pile seen here.  It looks like a check, but up close it is the smallest hounds tooth pattern I have ever seen.  There is still plenty of fabric left for another project!

Wednesday, February 16, 2011

My Creative Space - Finished!

Check out my first give away here. Still lots of time to enter!
A while back, before Christmas, I showed you some lovely green fabric with pink flowers.  Well I finally got to finished the project.  I made some matching Jammies for Ellie and I out of Simplicity 9499.  Ellie's came out great.  Mine, well, the shirt was a bit tight across the hips, so I curved up the hem.  The pants, on the other hand, turned out a bit large, but they are jammies - so except for all of you, who's going to see them?  Moral of the story - I am not a Man's Medium.
 Do you see the peanut in the background?

 The fabric is a jersey knit, on clearance, from Hobby Lobby.  Really pretty for jammies, but I can see why it was on clearance.
Incidentally, this is the same pattern I used for the Halloween costumes.
Visit some other creative spaces here.

Thursday, January 27, 2011

Fabric Toy Basket - Tutorial

Today I am going to show you how to make a basket out of fabric.  I decided I needed one to hold all the baby toys.  They used to be crammed into this old popcorn can.

Now they are happy in their new home (with room to grow)


What you will need: Outside fabric, lining fabric, cuff fabric, stabilizer (I used 'innerfuse')

I would recommend using a jeans needle, as things can get rather bulky.  My sewing machine also has a setting for heavy, woven fabric.

Start with your fabric spread out.  (Flat would be good. I should have ironed!).  I am using two old skirts that are old/out of style/too big.  One denim and one khaki.

Draw your circle - any size you wish.  Just remember you will lose about an inch in the seam allowance.


I wanted a 20 inch circle, so I used a pencil and string cut to 10 inches.


Cut out one circle of your 'good fabric', one lining fabric and one circle from your stabilizer.
Fuse them together, or baste with the stabilizer in the middle.
Next cut the strips for your sides.  This will require some math.  You can make them as tall as you want. (mine are 10 in tall)  For the length you will have to figure this out.  C=2 x pi x r   (Remember this from geometry?)   C = circumference  pi = 3.1412,  r is the radius - or half the distance across your circle.  So we'll take mine for an example.  My circle is 20 inches across.  Half of 20 is 10, so to find my Circumference:  2 x 3.1412 x 10 =  62.8.  I rounded that up to 63 and added an inch for seam allowances and cut my strips to be 64 inches long.  One strip of lining, one of outside, and one of stabilizer.
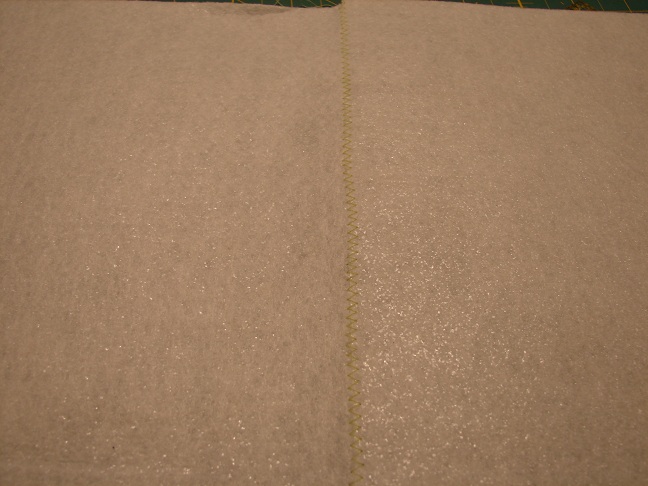
If your stabilizer piece isn't long enough, just put two ends together and join with a zig-zag stitch.
Fuse all three layers like you did the circles and sew the strips right sides together.  You are going to want to press your seam open.  Things will get a bit bulky.
Now, pin your sides to the bottom, right sides together and sew.  You should end up with something like this:
Now to the cuff.  This part will be folded over to hide our seams and for some contrast.  I used an old denim shirt for this part.  This will be cut to the same length as your sides.  Width is up to you.  Depends how deep you want your cuff.  Mine is 9.5 inches, 4.25 when folded in half.
Sew your strip into a circle by joining the ends, right sides together.  Then fold in half, iron and baste across the top edge.
Make some handles, if desired.  I just used the hem from the skirt, cut to length.  You could fold over some fabric and sew up the sides, or even use webbing from the fabric store.
Pin your handles where you want them. They should be pinned to the lining side.  You could measure, I just eye-balled it.
Now pin on the cuff to the lining side.  The handles should be sandwiched in between.
Sew cuff to top of the basket.  I ended up turning mine right side out and then sewing.  It was a lot easier to maneuver under the machine.
Here is the cuff sewn on.
Turn the cuff out and press.  You could even top stitch it down.  I haven't yet, but I'm considering it.

 And you have a baby boy Basket.
 I mean baby Toy Basket