Let me start out by saying, I'm sure there are lots of other tutorials on English Paper Piecing. Probably even better than this one. But I have lots of friends and family who always ask questions about what I'm doing, so I put this together so they could see - and maybe it would help someone else out, too!
I print out my hexagon shapes from
incompetech.com. The link will take you right to Hex graphs. You can print out any shape in any size. It's pretty nice. I use hexagons that are 1 inch on each side, this makes them 2 inches across. I also use what ever scrap paper is around the house to print them. I think it makes it a little more interesting to look at, and its green!
Print out your desired hexagon size and cut them out along the lines.
I like to use a 1.5" pin. I find that its big enough to hold the paper without shifting, but doesn't get too much in the way of the needle and thread.
Place your paper on the wrong side of the fabric, leaving space for at least 1/4" seams all the way around.
Pin. I like to pin across point to point.
If you've got a larger piece of fabric, pin as many papers as you can.
Cut around the papers, eyeballing a 1/4" seam. You can go bigger, but that can add bulk. If you really need to you can go smaller, close to 1/8", but you will have to take extra basting stitches to hold it in place.
Thread: Use the oldest, cheapest, brightest thread you have for basting. Its going to get pulled out when you are done and brighter is easier to see.
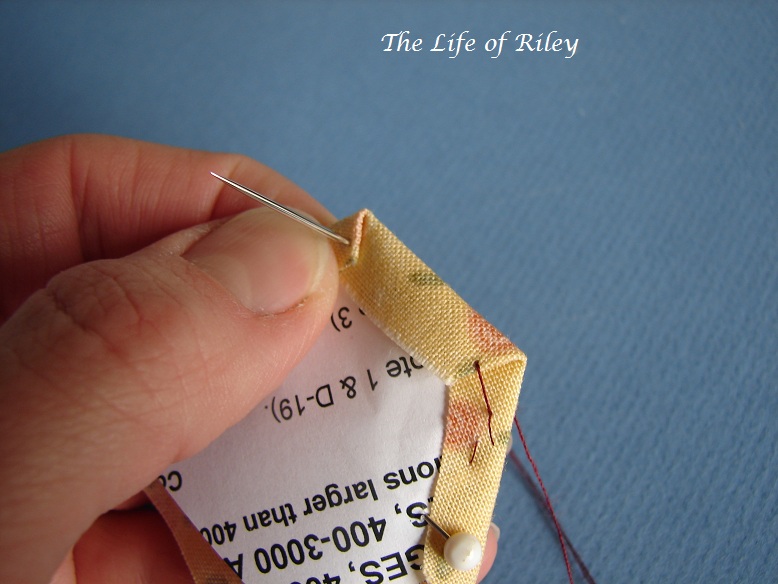
Holding the hex in your non-sewing hand:
Fold over the first side to stitch. As you can see the in the picture, I try to tuck it under the pin head, this helps hold it in place.
Push the needle up, down, up to create a secure back stitch.
Now, fold over the next side, making sure the corners are tucked in.
Take your stitch through the corner, securing both sides.
Rotate the hex, fold over the next side, tuck in the corner and take the next stitch on the corner.
Do this all the way around the paper, taking another back stitch at the end to secure.
This is what it will look like on the front.
You might feel like you're all thumbs doing this at the beginning. I know I did. Now that I've done close to 1000 hexies, I can baste one in 1.5 minutes.
Joining the hexagons:
Just put two hexagons right sides together and do a whip stitch along the side.
In this case, use good thread! Finer thread, that either matches or blends in. I have been using Aurifil for all my piecing lately. Both hand and machine, I just love it. I used my basting thread here, so you could see the stitches.
Keep on sewing hexagons together until you have whatever size/shape you're going for.
For the next three posts, I'll have fun tutorials to do with your Paper Pieced Hexagons.


No comments:
Post a Comment