Showing posts with label dresden plate. Show all posts

Friday, October 19, 2018

Mini Dresden Progress Update

Hello!

I have spent the late spring, all summer and early fall working diligently on my Mini Dresden English Paper Piecing Project.  If you follow me on Instagram, you'll know that I keep updated with the plates as they are finished, but today I thought I'd talk a bit about the process.

I talked about the beginning some in this post - and will probably repeat some of that info here, too.

I start by using my Silhouette machine to cut out cardstock papers of the petals/wedges.

It takes 12 papers to make a plate, I've got 100 plates done, so I've used at least 1,200 papers. That doesn't include the basted wedges that haven't been sewn together yet - so probably towards 2,000 papers at this point.  So glad I can make them at home.

In my first post I showed you the box of "squares" I was working with.  Here's a photo of what's left:

That stack in the upper left is all the same fabric.  It will not all get turned into wedges.  In fact, it may end up in the fire....
So, I just lay out my wedge.
Trim off a bit of excess fabric.
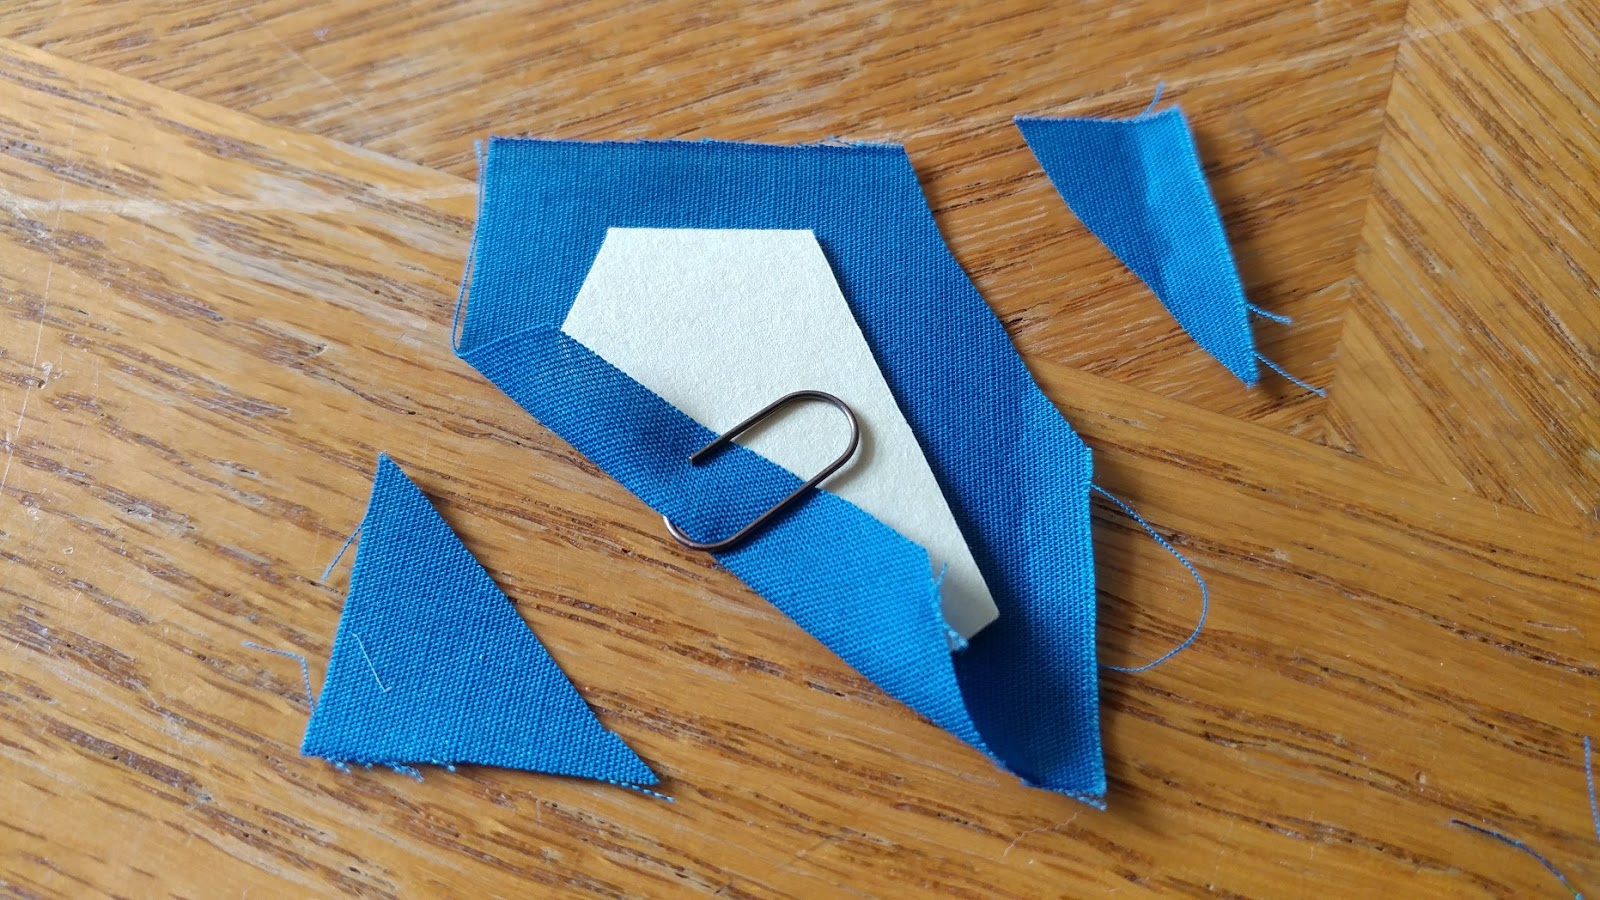
Use one of my tiny paper clips to hold the fabric to the paper. 
Here is a bunch, lined up and ready to baste.  I am not actually basting to the papers, but am basting in such a way that the thread will not have to be removed.  

 I bring them pretty much everywhere.  You just never know when you are going to have waiting time. 


This picture was a couple of weeks ago.  I just wanted to see them all at once.  I am totally embracing "more is more" 
 When I have a set of colors basted, I organize them by fabric and number.  Above is anything less than six.
 These are the sets of 6 that are not yet sewn.
 My last two assembled plates.  The above bothers me a bit, being half and half, but I will probably leave it. These are numbers 99 and 100.

 I plan on appliqueing onto a scrappy neutral background. The biggest decision right now?  The fabric choice for center circles.  Navy? Cream? Black? Brown?  Change it up for each one?  Definitely a long way to go before I have a finish.

 My finished stacks.


Monday, May 14, 2018

The New 10 Year Project

What?!? The NEW 10 year project?  What happened to the old one? Is what I'm sure you are asking.
Well, thanks to some prodding from my son the other evening, the hexies are entirely pieced.  Is the project done?  No.  I need to applique the hexies on to a border (I'm leaning toward yellow)  and then quilt the thing, but I've still got 1 year and 10 months to go before my 10 years is up.


I have, however, started a new project, because I needed something small to carry around with me. 

A while back my SIL picked up these vintage squares for me at a rummage sale.  I've been debating what to do with them.  They are roughly 2" square.  When I say roughly, that's because they were marked with pen and then cut.

They are therefore, not consistent enough to sew by hand. 

 After some looking around on the Paper Pieces website I decided on Dresden Plate wedges, or petals, or kites- what ever you want to call them.    Then I noticed the cost - and I'm pretty cheap thrifty- so I decided to see if I could make my own templates.
After some long time messing around, I finally got them figured out and just the right size for my patches.

I also ended up purchasing some small paper clips.  These are just 5/8".  When I basted my hexies, I had basted them right to the paper.  These templates are card stock so I didn't want to sew through that, and I am not a fan of glue basting.  It doesn't seem to want to come out cleanly for me.  Anyway, I needed a way to hold the fabric still when I started the stitches.
So, I've been making fan blades/petals/kites/whatevers.
This was the first one I made, and I realized a couple of things: Dresden Plate quilts are inherently scrappy - so you can actually see the individual pieces - and not to finish/baste the bottom of the blade - its not necessary and the extra fabric will be needed for appliqueing the center on.
I've been keeping colors together with binder clips.
A rainbow, of sorts.

A two color.


 I've been using this tin to hold the templates and binder clips.  My new watch came in it and its perfect!
 So is my new watch.  My last Baby G lasted almost 10 years.  I'm the kind of person that needs a watch - I don't rely on my phone for the time. 


Friday, November 13, 2015

Schnitzel and Boo Mini Swap Finish

 I signed up for three swaps this year.  They are all complete, now. My last one went out this week, and it is the first one I'm going to share.
I made this dresden plate mini for the Schnitzel and Boo Mini Quilt Swap.
First I bought a charm pack of reproduction fabrics and picked out 10.  2 blades per color.

You may notice that I had to change up one of the fabrics after I put the blades together.  I happened to lay them against the turquoise and it just popped!  I knew where I was going after that.
(blurry picture, sorry) I then came across a pattern in Missouri Star Block Magazine that had the added triangles to make a sunburst with the dresden blades.  Brilliant.

 I made a second plate of white blades to put behind the colors.

 Making sure the white strip was what I wanted on the border.

 Hand quilting with 6 strands of floss around the edges.  I had to use pliers for the center.  Up to 8 layers of fabric in some places, plus batting!
 I used an extra white blade for the label on the back.
 As a bonus I made this little EPP mug rug, too.
 Now I'm dreaming of other dresden projects. They are super fun to make.

Linking with Crazy Mom Quilts for Finish It Friday.